- Sign up for a Cloud9 Account! It's very easy, simply go to cloud9ide.com, and click on the sign up button:

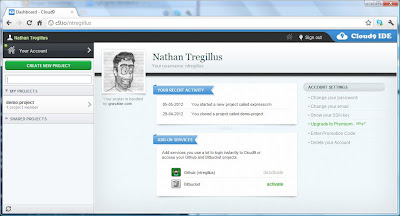
- Do all of the rigmarole for setting up the account, and eventually you will get to your Cloud9 Dashboard:
- Click the big green button on the left navigation pane, and select "Create a new Project," enter a project name, select your favorite source share/control site, and finally click the big green Create. I choose Git for this guide.
- The project will take a few seconds to clone:

*note* if it takes longer than a few seconds, refresh your browser, I have noticed Cloud9 can hang up while cloning the project. - Once the cloning is complete, select the project in the navigation pane, and within the edit pane, click the big green "Start Editing" button. It will open the project in a new window.
*note* If you get a half loaded page, close the window, and click the "Start Editing" button again. I have notice the initial loading of the editor has some strange issues, probably due to caches not being loaded fast enough for the page or something to that effect. If you are still having issues, try clearing your browser cache, and running your browser in anonymous mode. - We now run the following command in the console text box at the bottom of the IDE:
npm install express
You will see the package installation details in the console output, and if you refresh the project files navigation pane, you will now see a folder called node_modules, containing the express modules files.
This just sets up the use of express module. One problem is that while we have installed express, we could just manually create all of the view controller crap, but lets get express to template all that out for us: - Within the Program Files pane, drill into the node_modules\express\bin folder
- Double click the express file to open it in the editor pane.
- Click the Run button, and the form should auto populate with all of the details to execute the express site installer, EXCEPT the folder location you want to keep the site information in. I installed my site into ./DemandingDev :

*note* if you are still unable to run the express site installer from the run pane, rename the express file to express.js. hopefully this work around will not have to be used for long. (per some great people on the cloud9 team, thank you!)
We now have an express node app almost ready, BUT we still need to install dependencies. npm has an awesome feature to install all dependencies for you.
- To prepare for installing dependencies, run the following command to generate the json file describing all the dependent modules:
npm init
Command will generate a package.json file within your express project folder. - Now we will change directories:
cd [ExpressProjectFolder]
Where [ExpressProjectFolder] is the name of your project. - We now run the following command to install all the dependencies (AKA Jade templates module):
npm install -d
We have all the components now installed! - And now the last step to get this express application up and running on cloud9. We need to change the hard coded setting from listening on port 3000, to use the port provided via the process.env.C9_PORT environmental property:

With this port setting, we can debug the app.js file within your express project directory. Make sure it is the active file in the editing pane!
- Click the Debug button, then click the link that pops up in the command window:


You now have a functioning express node.js project up and running. I will periodically verify these steps work, and update this blog post if anything changes. Feel free to comment if you see a problem with my steps!
It works, you are life saver!
ReplyDeleteGreat Article
ReplyDeleteNode.js Project Topics for Computer Science
FInal Year Project Centers in Chennai
JavaScript Training in Chennai
JavaScript Training in Chennai
Smm panel
ReplyDeleteSmm panel
iş ilanları
İnstagram takipçi satın al
hirdavatci burada
Beyazesyateknikservisi.com.tr
servis
tiktok para hilesi
Good content. You write beautiful things.
ReplyDeletevbet
vbet
sportsbet
taksi
mrbahis
sportsbet
hacklink
hacklink
korsan taksi
Good text Write good content success. Thank you
ReplyDeletekralbet
slot siteleri
poker siteleri
bonus veren siteler
betmatik
betpark
mobil ödeme bahis
kibris bahis siteleri
sms onay
ReplyDeletetakipçi satın al
5EWT
manisa
ReplyDeletemaraş
mardin
marmaris
mersin
İW50
erzurum
ReplyDeletekuşadası
ümraniye
beşiktaş
ataşehir
J1ZDNU
beşiktaş
ReplyDeleteeyüpsultan
gebze
kaş
tekirdağ
70E6
kağıthane
ReplyDeletemuğla
tuzla
etiler
maltepe
37CN
kütahya
ReplyDeletemardin
maraş
hatay
düzce
ZQWAX
دهان الحديد ضد الصدأ
ReplyDeleteدهان ضد الصدأ
شركة مكافحة بق الفراش بالقطيف 0jP8e7Ip7x
ReplyDeleteشركة تمديد غاز مركزي بالرياض
ReplyDeletercelbHbHvt